Showing posts with label snowman. Show all posts

Wednesday, 30 December 2009

Happy New Year!


Don't forget to make New Year cards! This is an ideal opportunity to use up all your left over Christmas/winter stash!

Sunday, 20 December 2009

Snowmen Cards!


I just love that feeling when you know it's winter, it's cold outside, Christmas is coming and hopefully so is the snow. This week we had to start using the de-icer on the car!!!!! This cold weather has inspired me to make some snowman cards which are ideal for Christmas cards and also winter birthdays (which are so hard to make for without being too festive). These cards were made using ready-made toppers, I know it's cheating but as Christmas nears I find them perfect for quick makes for people you've forgotton (not that I've forgotten anyone again this year.........) My top tip at Christmas is to always have a handful of spare cards for when that friend you've not seen in a while pops round to give you theirs.

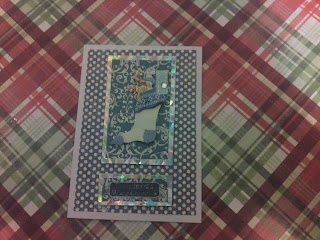
This snowman is so prettty flying like a Christmas angel. I decided to use Blue icy tones here to tie in with the chilly colours of the snowman and his blue scarf. I love using silver mirror board on my Christmas cards to add some festive sparkle. The 'let it snow' greeting comes from the heart as I'm desperate to build my first snowman of the year.


This card is made in a similar style to the first but here I used a Forever Friends greeting and some extra special swirly paper which looks to me like snow blowing in the wind.


I decided to use a swirly Christmas vellum greeting on this card to match in with the swirls of the background paper.


This card was the last in my snowman batch and as I was starting to feel a little cold I decided to use some warmer colours. The pink and brown is quite retro and the felt snowflake brad is so touchy feely and adds a touch of dimension.

Sunday, 29 November 2009

Snow Scrapping

These pictures were taken on the town moor in Newcastle last year. I love snow because it makes me feel so Christmassy. Me and James (the boyfriend) went for a walk on the moor to enjoy the snow. Lets wish for snow this Christmas.


This page is made using silver glittered chipboard letters which look snowy with the blue and white patterened paper. I also journalled in silver pen to keep with the icy theme, and added snowflake brads to the bottom corners of the photos.


Tuesday, 8 September 2009

Picture Frame


This is a beautiful idea that I stole from Create and Craft T.V. I give you the basic construction here but you can decorate this in any way you choose and totally change the look of this design. Give as a gift in a gift box, or send in place of a card.


To make:

Step 1- Start with a square of double sided card.


Step 2- Fold the square in half diagonally twice.


Step 3- Fold the corners into the centre to create a square.
h


Step 4- Turn over and fold the corners into the centre again.


Step 5- Fold the points out to the edge of the square to make a frame.


Step 6- Wrap ribbon around the triangles making up the frame and stick the points down to hold it in place.


Step 7- Decorate the centre. I used a sheet of pearlescent card and a decoupage snowman in the dark blue example and a photo of my beautiful poodle Teddy in the other.

Step 8- Turn over and fold down the two bottom flaps to make a stand.


Step 9-(Optional) Decorate the edges. I used peel off snowflake stickers on my snowman example.


Give it a try. You could also make Christmas decorations for the tree by threading ribbon through the top, or make photo frames by using photos in the centre as in my Teddy frame, or do what I did in my snowman example and just make pretty frames for any occasion.

Lucy x