Showing posts with label christmas. Show all posts

Thursday, 4 November 2010

Hanging Decorations

I've recently caught the stitching bug and have been making little hanging decorations to go on a new little Christmas tree for my craft room.

I've used felt to make elephant ones using a template, and added button eyes and ribbon for hanging.


These floral patterns were made in different shapes for a little floral accent to Christmas.

I made some holly shapes and used red beads for berries.


This bird was made with felt from a free template I printed off the internet.

Tuesday, 26 October 2010

Christmas wish list......

I've just discovered some beautiful papers to put on my wish list for Santa. The stack is called Classic Christmas by S.Dyment. It's a paper and die cut pack and the papers come with some really beautiful red foiling too. The pack is not just paper but also two sheets of die cut notelets that you could use as toppers for cards, embellishments for Christmas layouts, or even gift tags. Best of all it's only RRP £7.99 for the 12 x 12, £4.99 for the 8 x 8, or £3.99 for the 6 x 6. 

They also do a range of matching products to go with these papers, check out Docrafts to find out more, or click here. 

Monday, 25 October 2010

The Snowman


I loved the Snowman when i was younger, it was like a family tradition that we watched it all together on Christmas eve while Mum provided mince pies and hot chocolate so when I saw some Snowman postcards I had to buy them. The problem is I didn't want to just stick them onto cards, this didin't seem very creative to me. So instead I used three or four of the same design and created my own decoupage by cutting out different pieces from each image and layering them on top of one another. On some cards I used bright glittered papers with them for a modern look, where as others I used blue paper, to look like the snowy sky, I have to say I'm quite pleased with the results.


Thursday, 14 October 2010

I'm Back!!!

Well after a long and very busy summer, I'm back to my blogging. I've only just been able to find time to craft recently, but unfortionately had no time to blog, so I have lots to post about in the next few weeks. I've recently been focusing on card-making, getting ready for Christmas in particular, but this week I'm going to start making some little felt decorations too, yes thats right I've caught the sewing bug!

Although busy, I have managed to fit in a couple of craft shows.... I went to Alexandra Palace for the The Big Stamp & Scrapbooking Show on 25th September. I came away with some fabulous papers, cardblanks, foam tape,  embellishments and a lovely little elephant template which I've used so much already. Then on 3rd October we went to Hatfield house for the Rock Gem 'n' Bead show, I got some lovely gemstones which I intend to wrap in wire cages as pendants for my necklaces, and earings.

My jewellery making has been great through the summer as I've been able to squeeze in half an hour here and there without having to unpack lots of craft things, I enjoyed sitting in the garden for a while after work creating beaded gifts for people, while trying (and failing) to get a summer tan.

Buttons are also high on my agenda this month. I'm intending to try out some button covered favour boxes for my wedding with some little boxes I brought on sale for 10p each, and some more button jewellery too. We'll see how that goes......

Anyway off to work for me, there will be some pictures and crafts posted tomorrow. xxx

Saturday, 30 January 2010

Wrap it up!

I like to take pictures of all the getting ready for Christmas, this page is based on the wrapping up of the presents.

The background paper is a nice icy blue which ties in with the blue of my scarf in the pictures and also the cold season.


The title is made of odd letters in a cool colour scheme placed at jaunty and random angles.

I stuck random stickers with a present theme all over the page as interesting embellishmants.


I mounted the photos onto striipy paper and topped them with a beautiful snowflake bow.


Friday, 15 January 2010

In January.....

I'm going to start giving you my top hints tips and ideas in a post each and every month on the first of the month (I know that Januarys is late....)

So, In January..............

  • Pack away all your Christmas cardmaking products and start focusing on the New Year.
  • Get those Christmas pictures printed out and ready to scrapbook. It's a good idea to write down all the things you remember about Christmas now (whether funny stories or lists of presents, anything you might want to include in your scrapbook layouts), before you forget.
  • Buy the latest Docrafts Creativity. The free gift this time is a CD rom which is a perfect introduction into crafting on the computer for beginners or for adding to your stash for more experienced crafters.
  • Give jewellery making a try. It's great thing to do sat infront of the TV when the weathers cold and the snow just won't go away.

Tuesday, 29 December 2009

Christmas Table.


I like to take lots of unusual pictures at Christmas to show what Christmas means to me and my family.


For us the table decorations are a main focal point as my mum spends alot of time making sure both the table and food are perfect over the festive period.


So I decided to dedicate a page of my Christmas scrapbook to the Christmas breakfast table.

I used a rich red background paper.


The title is made of muddled up red/white letters on white/red squares which I applied a little wonky and messy.


The four pictures are arranged in a square and matted onto white and gold vellum.


Monday, 28 December 2009

Candle Christmas Cards


This book is such a great go to book for those last minute cards that you've forgotten to make, and I'm embarrassed to say I forgot quite a few again this year.


I particularly liked this candle card which I made in several colour schemes.

This card is great because all it uses is colored card and some sequins (which I always have in my craft stash) and only takes about ten minutes to make.

So I recommend this book highly as it's full of loads more fantastic cards.

Monday, 21 December 2009

Brad Tree

This is a great card to use up any odd brads that have been littering your craft room for a while.

Step 1:
Just take a plain card blank, I chose a white textured card.

Step 2:
Ink the edges with a chalk/ink pad. I used silver chalk as this looked best on the textured card.

Step 3:
Choose which brads you want to use and position them into a christmas tree shape. Make sure you save a star for the top.

Sunday, 20 December 2009

Snowmen Cards!


I just love that feeling when you know it's winter, it's cold outside, Christmas is coming and hopefully so is the snow. This week we had to start using the de-icer on the car!!!!! This cold weather has inspired me to make some snowman cards which are ideal for Christmas cards and also winter birthdays (which are so hard to make for without being too festive). These cards were made using ready-made toppers, I know it's cheating but as Christmas nears I find them perfect for quick makes for people you've forgotton (not that I've forgotten anyone again this year.........) My top tip at Christmas is to always have a handful of spare cards for when that friend you've not seen in a while pops round to give you theirs.

This snowman is so prettty flying like a Christmas angel. I decided to use Blue icy tones here to tie in with the chilly colours of the snowman and his blue scarf. I love using silver mirror board on my Christmas cards to add some festive sparkle. The 'let it snow' greeting comes from the heart as I'm desperate to build my first snowman of the year.


This card is made in a similar style to the first but here I used a Forever Friends greeting and some extra special swirly paper which looks to me like snow blowing in the wind.


I decided to use a swirly Christmas vellum greeting on this card to match in with the swirls of the background paper.


This card was the last in my snowman batch and as I was starting to feel a little cold I decided to use some warmer colours. The pink and brown is quite retro and the felt snowflake brad is so touchy feely and adds a touch of dimension.

Friday, 18 December 2009

Gingerbread men....

At the moment I'm just loving using gingerbread men (and candy cane) embellishments in my crafting. They're such a fun and envoke memories of making gingerbread men and houses with my mum when I was younger.

So I decided to give you  a recipe for making your own gingerbread men, I found it on BBC food and  it is just a great recipe.

Ingredients

200g/7oz self raising flour

10g/2 tsp ground ginger

1 tsp cinnamon

55g/2oz butter

55g/2oz dark brown sugar

2 tbsp black treacle

1 tbsp golden syrup1

finely grated orange zest

To decoratesweetened dried cranberries


Method
1. Heat the oven to 180C/350F/Gas 4.


2. Lightly grease 2 baking sheets with butter. Sift the flour, ginger, cinnamon into a mixing bowl.

3. In a heavy-based saucepan, melt the butter, sugar, black treacle and golden syrup over a low heat. Do not allow to boil. Remove from the heat and stir in the orange rind.

4. Pour the butter mixture into the flour and mix thoroughly to form a soft dough. Roll out the dough to approximately 4mm/¼ inch thick and cut 10-12 large people shapes or 25 small shapes, re-rolling the dough when necessary.

5. Using a palette knife carefully lift the gingerbread people onto the baking tray and decorate with the dried cranberries. Cook for 6-10 minutes until just set and beginning to brown.


Try it yourself.

Wednesday, 16 December 2009

Giveaway!!!!!


If any of you live in the US, check out http://groggyfroggy.blogspot.com/ . This lovely blogger is giving away a fab free gift of a lovely Christmas display and a santa egg (sounds wierd but really nice). All you have to do to enter is join to follow the blog, and post a message about it on your own blog. I'm so sad I can't enter though as you have to live in the USA. Good luck!!!

Sunday, 13 December 2009

Forever Friends


At the minute I'm just loving all the forever friends products. Here are some of my cards made using the FF Christmas decoupage and Christmas stickers. (I also used Anitas glitterations, Daisy and Dandelion papers and Craft Companions Stick and Sparkle). There are loads of Ff products out there in two ranges Christmas and everyday. Try bringing these lovable characters into your crafting.

Thursday, 3 December 2009

Jewellery for Tor!!

Check out my very talented sisters fashion blog http://fabfrocks.blogspot.com/ the post is called keeping it in the family to see the beautiful necklace I made her to say thankyou for hosting a wonderful festive weekend for the family, and also for some hints and tips on what to wear for that special Christmas party. I've also made both my sisters some lovely pieces for Christmas but I won't post the pictures yet because I know they'll take a peek and ruin the suprise.

Wednesday, 2 December 2009

Gatefold Glory

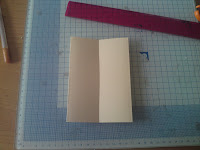
As all cardmakers can testify always making regular A5 cards can become a little mundane. So why not try a gatefold card instead?


How to make a gatefold card.

1. Start with an A4 sheet of card.


2. With a ruler find and mark the centre with pencil.

3. Fold one side in to meet the centre.


4. Repeat on other side.

5. Rub out pencil maerks and decorate (inside and outside).


Tuesday, 1 December 2009

Vintage Christmas

Product Focus: My Mind's Eye Christmas cards sets........


My Mind's Eye Christmas cards sets contain 50 beautiful printed Christmas cards just waiting to be embellished. The front is printed with a pattern and the back with a complimenting block colour. They are ideal for quick Christmas makes when you've got too many cards to make, and not enough time to make them in. The designs are quite vintage looking with some distressing to the edges which lends itself well to more traditional or vintage looking designs. 


Thursday, 19 November 2009

Cute Companion Window

I made this beautiful card using free Cute Companion papers from Creative Cardmaking issue 9. I just loved the cute window image and decided to add a wintery background through the window by cutting out the window panes and adding a snowflake background paper behind it and also some glitter (well it is Christmas). I thought it would be fun to add Santas sleigh flying across the window.


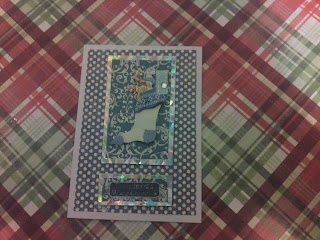
Flowersoft lampposts


Flowersoft is still one of my favourite products. Here are some beutiful vintage, Victorian looking cards I've made with the Flowersoft Toppers- Vintage Christmas Lamp-post. You get a pack of ten, two designs, five of each beautiful holly and ivy vintage toppers. (Measurements approx. 17.5cm x 4.8cm) RRP £2.59. I used Vintage Christmas, and Christmas green on my cards but you could use any colours you wanted to.